
I use Ghost as my engine to run this blog, and it has been a joy to use and write in. But because I self-host this blog, the setup to do so was not simple or intuitive, and I ended up spending a lot of time and effort getting this blog and running because there was no single tutorial for my situation. Server management is hard, yo.
This post seeks to fix that particular problem. In it, we will list everything you need to host your own Ghost blog on your own server space, as well as things you need to do to maintain said blog and get search engines to find it. To be frank, it's a lot of steps, but ultimately you will control your own site and learn a bit about how the Internet works and how server management is done.
Let's set up a brand new Ghost blog in 16 easy steps!
1. Buy a Domain Name
Before anything else can happen, you need your own domain. I'm a big fan of having control over your own content (versus publishing solely on another platform like Medium) and you can't do that without having your own domain. Plus, having a custom domain name makes it easier for your readers to remember you and recommend you to their friends. You can use many, many different services to buy domains, but the one I use is iwantmyname and they've been fantastic to work with.
2. Get Remote Access Tools
You're going to need a few tools to access your new droplet. For Windows machines, I recommend PuTTY, a telnet client, and WinSCP, an FTP client. You use PuTTY to run command-line commands on your droplet, and you use WinSCP for file operations (e.g. copy, move, create directory, things like that).
3. Get Hosting Space
You can do this in one of two ways. If by some miracle you already have your own web server in a location you control, you can just use that. The vast majority of people, though, don't have web servers just lying around, and so they have to rent server space and time from a provider for a monthly fee.
There are a TON of hosting providers out there, including:
The one I use and recommend is DigitalOcean; they have a fantastic interface and tutorials which help you set up your "droplet" (AKA your server) with the host environment necessary for Ghost. Plus, the cheapest plan they have is $5/month, and that's pretty dang good for web hosting.
The recommended server configuration at the time of writing for hosting a Ghost blog is Ubuntu 16.04 and DigitalOcean has that OS as a default option for your droplet. You will probably want to enable backups for your server; though they cost an extra $2/month, they'll be invaluable if (when) you accidentally torch your server.
NOTE: The rest of this tutorial is going to assume you're using DigitalOcean for hosting. The details may be different for other hosts.
4. Test Access to Your Droplet
The first time you access your droplet, you should do it through your provider's recommened access method. In DigitalOcean's case, that's the in-dashboard console:
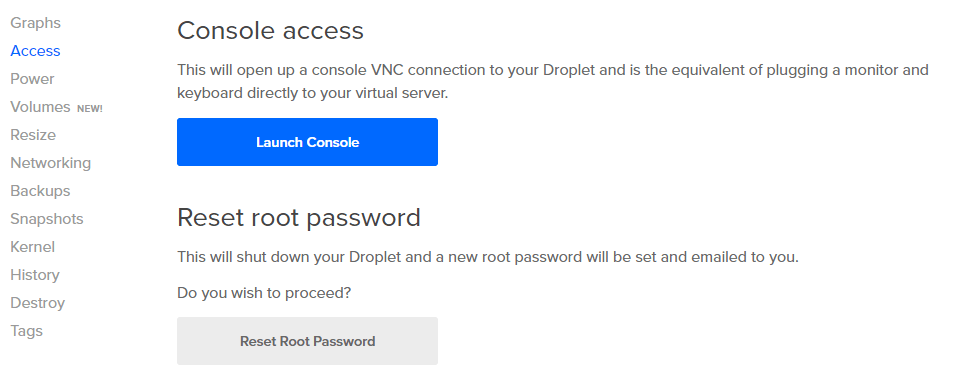
This allows you to set up a root password for the system. I heavily recommend also setting up a non-root user through which you can execute changes, but if you don't do it now you'll end up doing it when we install Ghost.
Once the root password (and optionally the other user account) are set up, you can use it to log into your machine with PuTTY. I'd recommend testing this before moving on to the next step. You might want to check the docs if you're having trouble getting PuTTY connected to your droplet.
5. Add Your Domain to DigitalOcean
In the DigitalOcean admin site, you can use the Networking tab to add your domain to DigitalOcean's records.
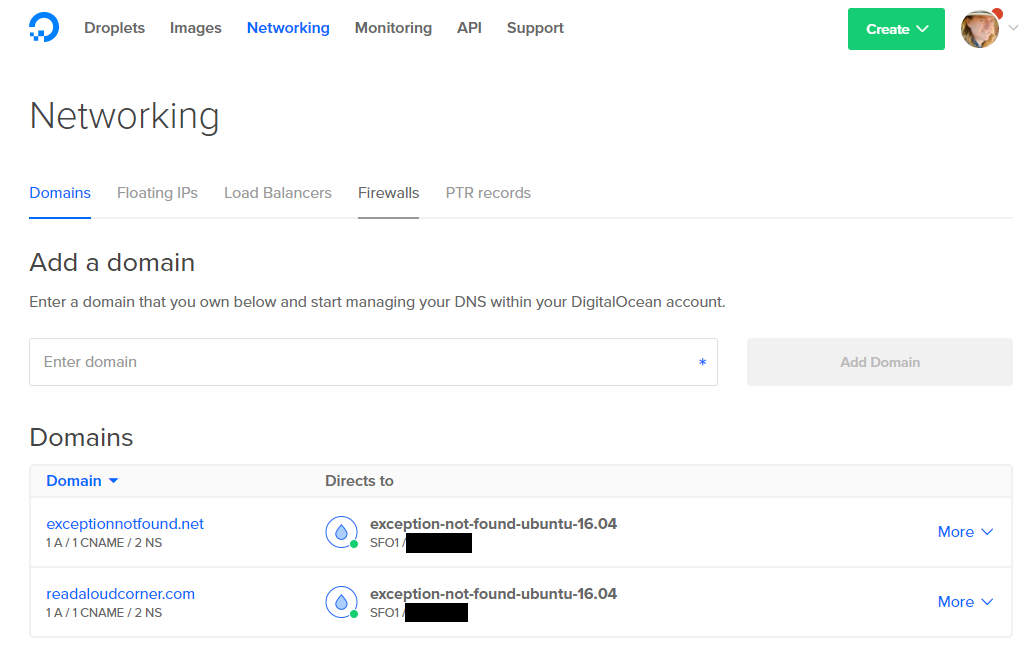
After this, you'll notice by clicking on your domain that DigitalOcean has used nameservers of their own design. Now we need to update our domain registrar to use these nameservers.
6. Change Your Nameservers with Your Registrar
The internet uses something called Domain Name System to translate IP addresses (which every Internet-connected device has) into domains and vice-versa. Once you've got your droplet online and can access it with PuTTY, you are ready to change your name servers.
Going back to your domain registrar's site, you now need to change the name servers used to match DigitalOcean's name servers. This process is different for each domain registrar. In my case, it was simply select the domain -> update nameservers -> enter the new nameserver names.
7. Wait
Yep. Once you change your nameservers, it can take up to 48 hours to propagate throughout the DNS. You'll know it's done when you hit your domain in a browser and get some error other than the DNS Not Found error.
8. Prepare Server
Once the changes have propagated through the DNS, we are now ready to prepare our server for installing Ghost. (Strictly speaking, you do not need to wait for DNS propagation to do this step, but I find it is helpful to do so because you can immediately check for Ghost installation issues).
The full installation instructions can be found on Ghost's site, but in short they consist of the following steps:
- Create a new (non-root) user.
- Give that user appropriate permissions.
- Update installed packages.
- Install NGINX.
- Install MySQL.
- Install Node.js.
- Finally, install the Ghost CLI.
We can now use the Ghost CLI to actually install Ghost on our server.
9. Install Ghost
Installing Ghost is pretty easy; it's just executing the command ghost install at the location on your server where you want Ghost installed, following the prompts, selecting exactly the right options, praying, and then quite possibly doing it again because you forgot that NPM wasn't updated yet. Simple.
Joking aside, the install steps are pretty easy for the default installation. If you want anything other than the default (or, in my case, SSL), the install can get a bit tricky. It's not terribly difficult, but it can take some patience.
The full guide to the prompts from the Ghost installer is over on Ghost's site. You'll want to follow those instructions closely.
10. Pick a Theme
Once you've got Ghost installed, try to hit it from a browser using your custom domain. If you see the default Casper theme for your blog, congrats! Your installation is complete. But there are still a few more things we need to do to get your blog ready for prime-time.
First, we need to pick a theme. The default Casper theme is perfectly functional, but because it's the default it will make your blog look like all the other Ghost blogs out there, and we want to stand out, not blend in. You need a different theme.
There are quite a few free and paid themes at the Ghost Marketplace. Exception Not Found (this blog) uses a heavily modified variation of the Lyra theme from Ghost.
Once you've selected your theme, you can upload it to Ghost using the Ghost admin panel (which is accessed by going to http://yourdomainname.com/ghost) and selecting the Design tab. Here's a sample:
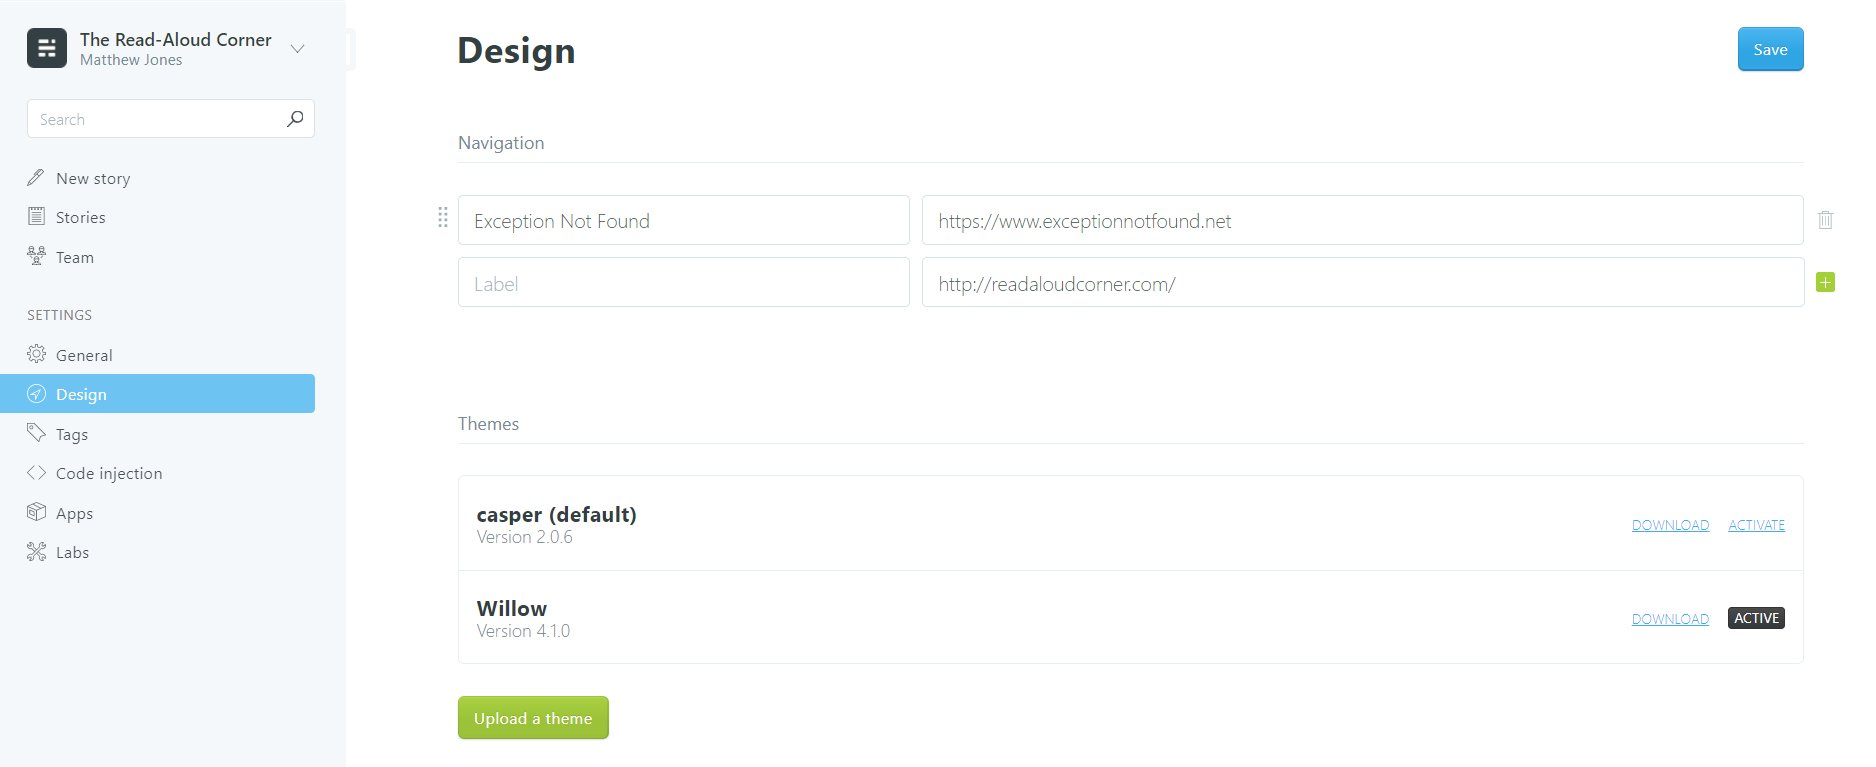
Once you've got your theme uploaded, activate it from this tab to see it in action!
11. Add Cloudflare
Technically the next two steps are optional, but I'm including them because they provide MASSIVE scalability and security benefits to your blog.
Cloudflare sits between your server and the greater internet, providing DNS services, security, and caching options which allow your site to scale much more widely. Considering that DigitalOcean and many other hosting providers charge you by how much bandwidth you use, this could be both a significant time saver for your users and a cost saver for you.
To set up Cloudflare, sign up for their service and add your new blog to their system. Once you've got it added (and Cloudflare has verified it) you will need to walk through changing your nameservers (yes, again) to point to Cloudflare's name servers; you'll need to do this with both DigitalOcean and your domain registrar. You can also configure other things, such as caching for your CSS/JS/Image files and your SSL security level. Unfortunately, changing your nameservers also means you have to...
12. Wait (Again)
Yep. I've noticed, though, that both times I have set up a blog with Cloudflare, this step has taken significantly less time (something like 4 hours).
Now that our site is active and has Cloudflare, let's add a few tools which will allow us to manage our site more effectively.
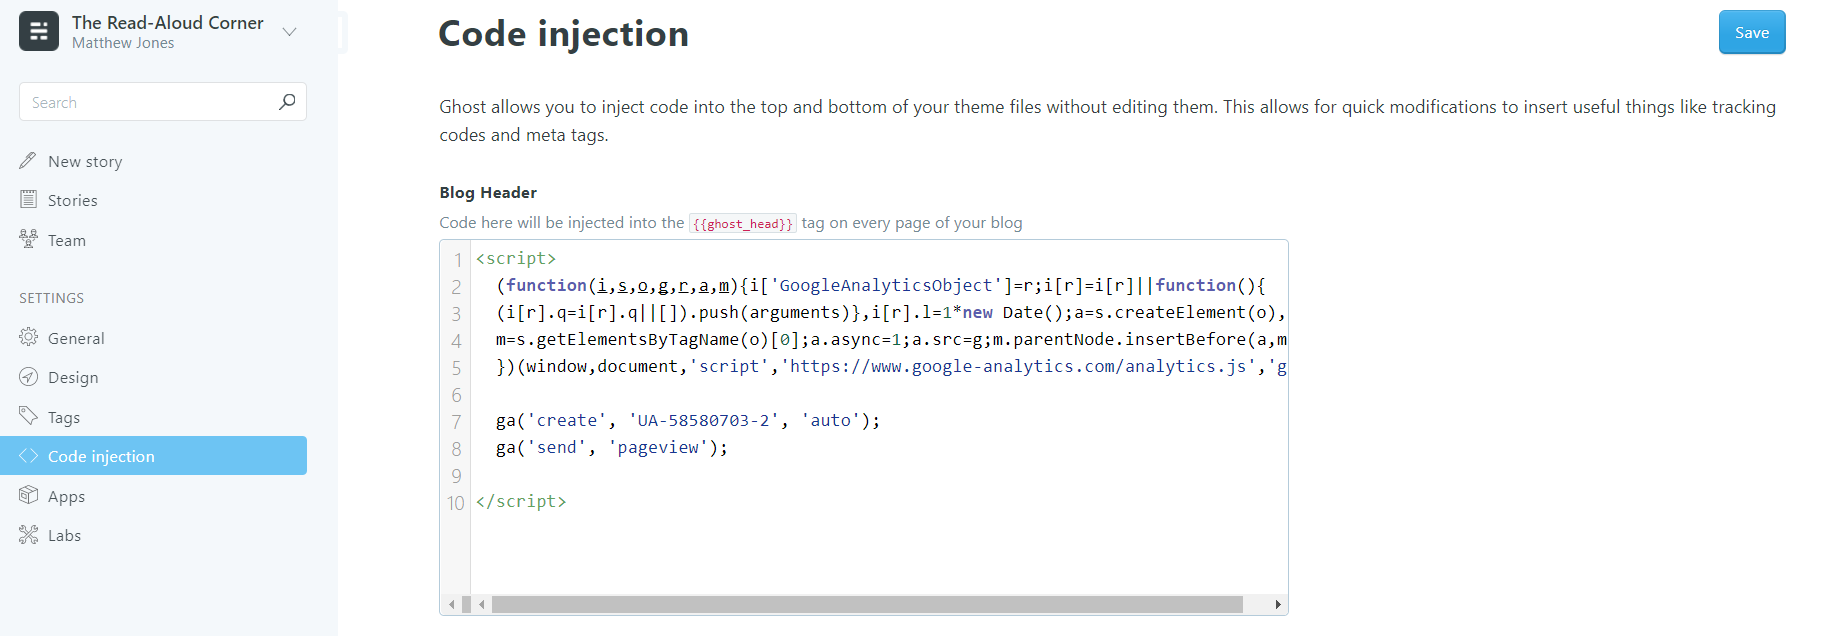
13. Install Google Analytics
The best way to determine who is visiting our site is to use Google Analytics, a software package which tracks where users are coming from and how long they stay. You can get started by following this guide to get Analytics installed.
The one specific recommendation I will make is to use Ghost's Code Injection tab to insert the Google Analytics tracking code.
14. Add Comments
This blog uses Commento, after I got fed up with Disqus and their tracking scripts. Commento is very easy to set up; follow the instructions on their site to do it, and just add a single script and a single new markup element to your pages where you want comments to appear.
I recommend modifying the post.hbs file in the root of your theme to add Commento, rather than using code injection. This is because code injection will inject to every page, including tag pages where you may not want comments. However, if you don't mind comments being on every page of your blog, you can use code injection for this step and it'll work just fine.
Please note that the steps might be different for different providers (e.g. Disqus).
15. Submit to Google Search Console
The last thing we need to do before starting to write our content is to tell Google that our site exists. Ghost automatically creates a sitemap for your blog at http://yourdomainname.com/sitemap.xml (Here's the sitemap from Exception Not Found). We can submit this sitemap to Google so that it will (eventually) add it to their index.
First, sign up for Google Search Console. Then add your domains to the dashboard. (You will need to add both http://yourdomainname.com and http://www.yourdomainname.com). Finally, use the Sitemap tab to add your sitemap.
Note that Google will not immediately index your site; it can take weeks before it starts getting crawled at a regular rate. But at least now Google is aware that your site exists, and since you probably won't have any inbound links that will help you in the early going of getting your blog found.
16. Write Great Content!
At last, we can start doing what we wanted to do this entire time: write some content! There are lots of blog posts out there that say how to write good blog posts, so I'll just leave a few tips here:
- Stick to your audience. Don't mix and match content. Readers of Exception Not Found come here for technical content; including content on, say, the best way to make craft unicorn horns would not be useful to the audience of this blog. Pick a niche, and write your blog for that niche.
- Write the title last. A good title is an advertisement for the post. You can't write an effective ad without knowing what you are advertising.
- Focus on the content, not the writing. You don't need to be a good writer to be a good blogger. Just focus on saying what you want to say and cut out things that aren't necessary, and the readers will come.
- Be patient. It takes a long time to get readers. But if you keep writing good content, they will come.
- Write a LOT. Once a week at least. They don't all have to be killer posts, but at least write often enough that your readers will know that you aren't going to just disappear.
Summary
As you can see, it takes quite a few steps to host your own Ghost blog. From getting your own domain and server space, to submitting your sitemap to Google and writing great content, managing a blog is a bit of work but a lot of fun.
As you move forward with your blogging adventure, remember to do the following things:
- Use CloudFlare to reduce site bandwidth and implement SSL.
- Use Google Analytics to see who visits your site, what they're viewing, how long they're sticking around, etc.
- Use Google Search Console to see how your blog posts are doing in search results and manage your sitemaps.
- Use PuTTY and WinSCP to manage your server directly.
- Keep track of Ghost's releases on their GitHub page.
- Most importantly of all, take the time to write great content! Great content is what gets readers to come to your site and stick around.
If you see any steps that I missed, or would like me to expand upon in a future post, please let me know in the comments!
Happy Blogging!