This is Part 6 of an eight-part series describing how to design a database for a Workflow Engine. Check out Part 1 here:
We've now got most of the Process tables defined, but we are still missing a few things.
One of those things is a definition for exactly who can perform Actions or receive Activities; we're going to call this Targets.
The second piece we need is Groups, or collections of people that perform a similar or related job in this process. In our design, we want to allow for a Group to also be a Target. Let's see how we can design these tables!
Groups
A Group is a collection of Users that perform related functions.
For example, we might have a group called Programmers that actually write code, or a group called Executives that approve projects for development. Because we are building a generic Workflow Engine, we want to make sure that each Process can have its own Groups.
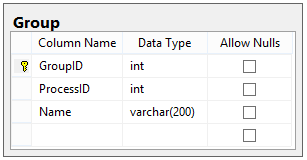
The Group table is pretty straightforward:
We also need a table to represent which Users are in a given group, which will be another many-to-many table. This table is called GroupMember:

Targets
Remember that this system is people-focused; only people can action the Request. We still need a way to associate which persons (or Groups) can perform Actions and receive Activities.
The problem is that we may need to specify that only the Requester of a given Request can send that request to his/her supervisor, or that all of this set of people need to receive an email when a Request reaches a certain State. How can we design this in such a manner that it is flexible in who can perform the Action or receive the Activity, but still implements a few rules that the engine must follow?
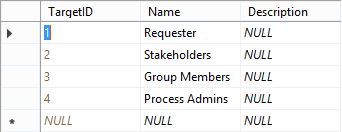
We can accomplish this by creating Targets. A Target is a set of standardized representations of a person who have specific roles relative to a Request or Process. We use the following targets:
- Request Creator (Requester)
- Request Stakeholders
- Group Members
- Process Admins
Our Target table looks like this:
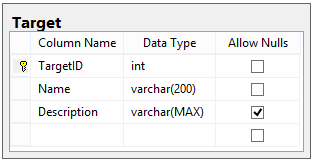
Because this is another static table (like StateType, ActionType, and ActivityType), we don't expect the data in it to ever change. Here's the data we will be using for this design:
Action Targets and Activity Targets
The Targets table does us no good unless we can relate it to other tables that can actually use the Targets. We want to use Targets in two scenarios:
- As people who can perform Actions
- As people who can receive Activities
Let's design Action Targets first. For every Action that can be submitted to this engine, we need to define who can actually submit that action for it to be considered valid. After all, we don't want janitor Kevin approving the construction of a new grocery store, since that's not his responsibility. With this in mind, our table design looks like this:

We needed to include Group ID because if our Target is a Group, we have to specify which Group can perform the Action.
Now let's discuss Activity Targets. Depending on the kind of activity, the Targets for that activity could receive an email, or be added to the stakeholders list for a Request, etc. Because we've defined a central list of Targets, the ActivityTarget table looks remarkably similar to the ActionTarget table:
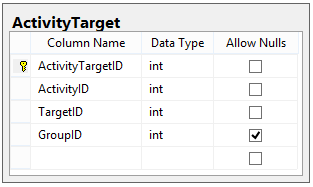
IMPORTANT NOTE: When using a Group as a Target, the way the system interprets this relationship is different.
- If the Group is an Action Target, then any member of the Group can perform the action for it to be valid.
- If the Group is an Activity Target, then all members of the Group receive the Activity (e.g. everyone in the group gets an email).
What did we accomplish?
Our design for Actions, Activities, Groups, and Targets now looks like this:
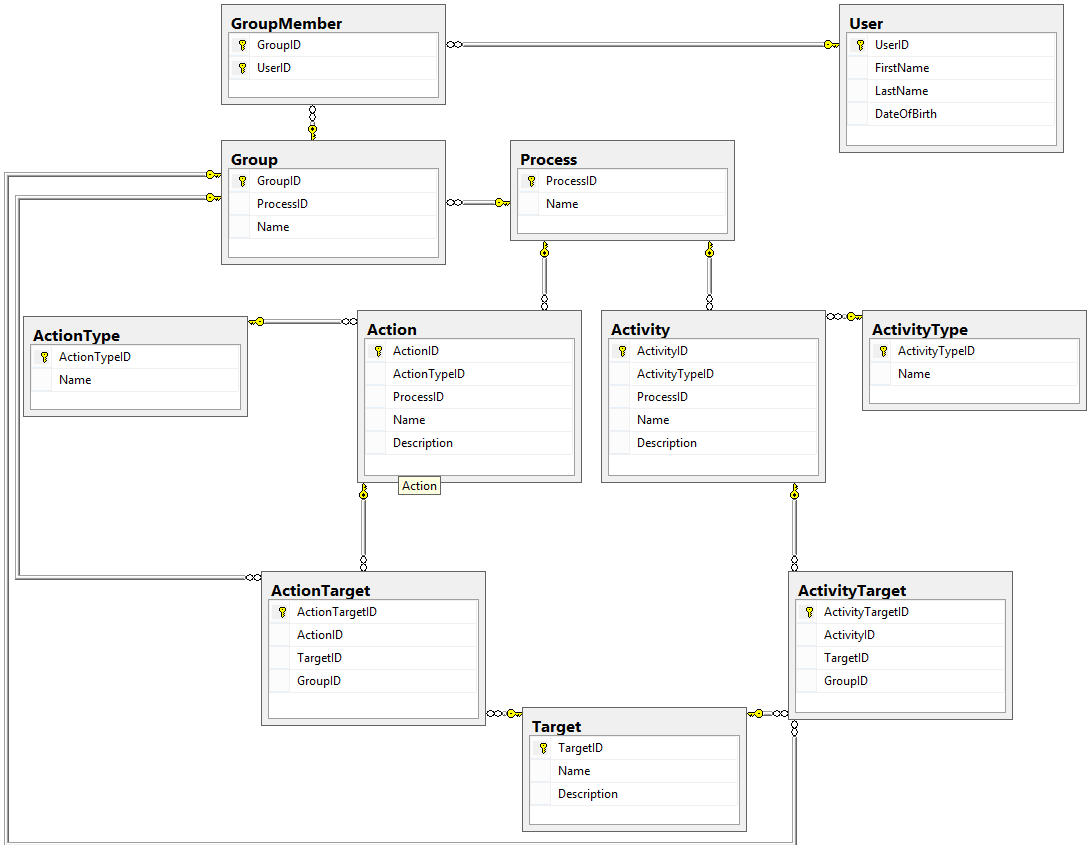
In this part, we nailed down exactly who could perform Actions and receive Activities by creating Targets, and we gave our engine a bit more flexibility by creating Groups of Users who could each do the same thing as the others.
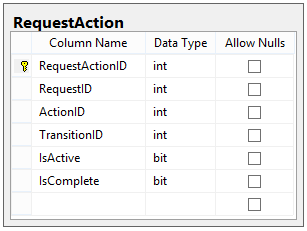
In the next part of this series, we get to the real meat of the system. We'll show how individual Requests can track which Actions can be performed against them, and we'll see how we can use that list to determine which Transition the Request needs to follow. Next up is Part 7 of this series, Request Actions.
Happy Coding!


